Controlling Blender with MCP
Creating 3D Assets with Blender and AI
To create 3D assets for my website, I combined several AI tools with Blender in a streamlined workflow. Here’s how I approached it:
1. Generating Concept Art with Gemini NanoBanana
I’ve never been good at traditional art. So creating my own visuals from scratch wasn’t realistic.
I was famaliar with image generation, as I started experimenting with it in early 2025 during the Studio Ghilbi craze. I even fine-tuned a model with LoRA to generate images of myself (which I’ll show in a separate tutorial), back when trying to generate accurate images with a single prompt usually gave poor results.
At a Google developer event, I discovered Gemini NanoBanana, an AI image generation tool, and was impressed by its accuracy. Using NanoBanana, I quickly generated concept art to visualize myself and and iconic Singapore building.
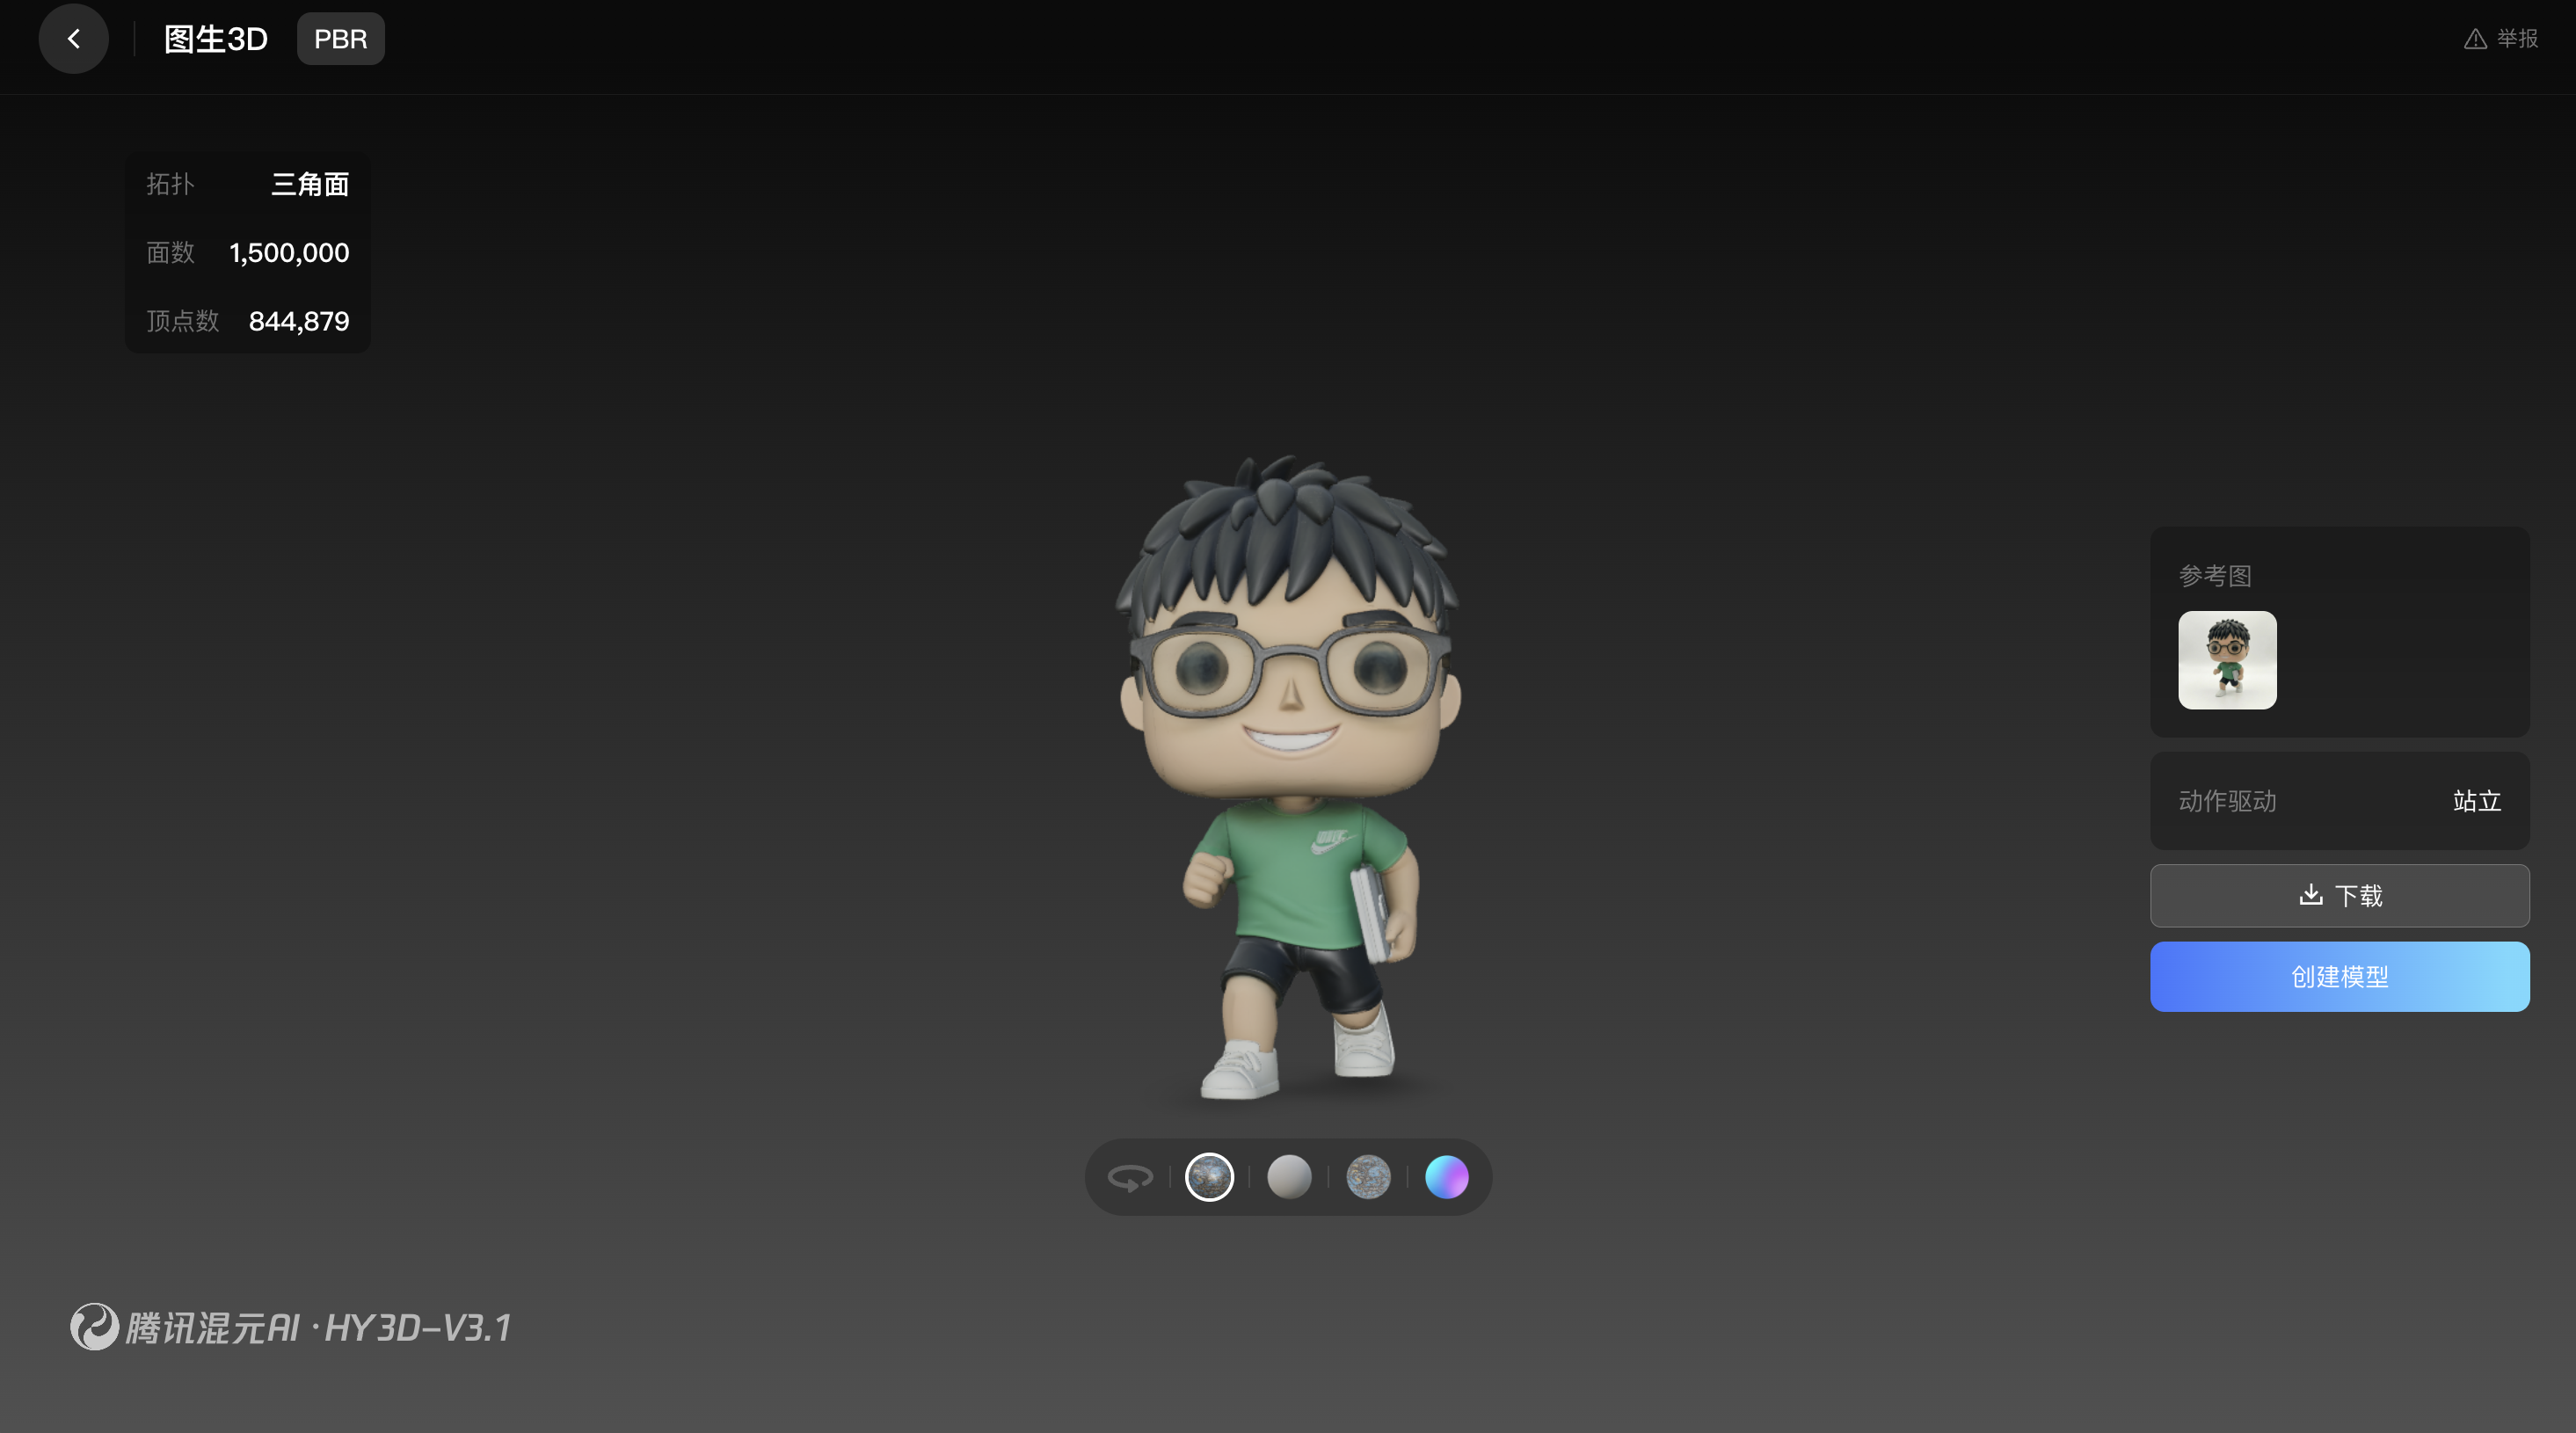
2. Creating 3D Models with Tencent Hunyuan
With the generated images ready, I then used Tencent Hunyuan to generate 3D models directly from those images. Using the free API credits, I created two 3D models based on my concept images and was amazed by the results, saving me hours of manual modeling.
3. Refining and Animating in Blender
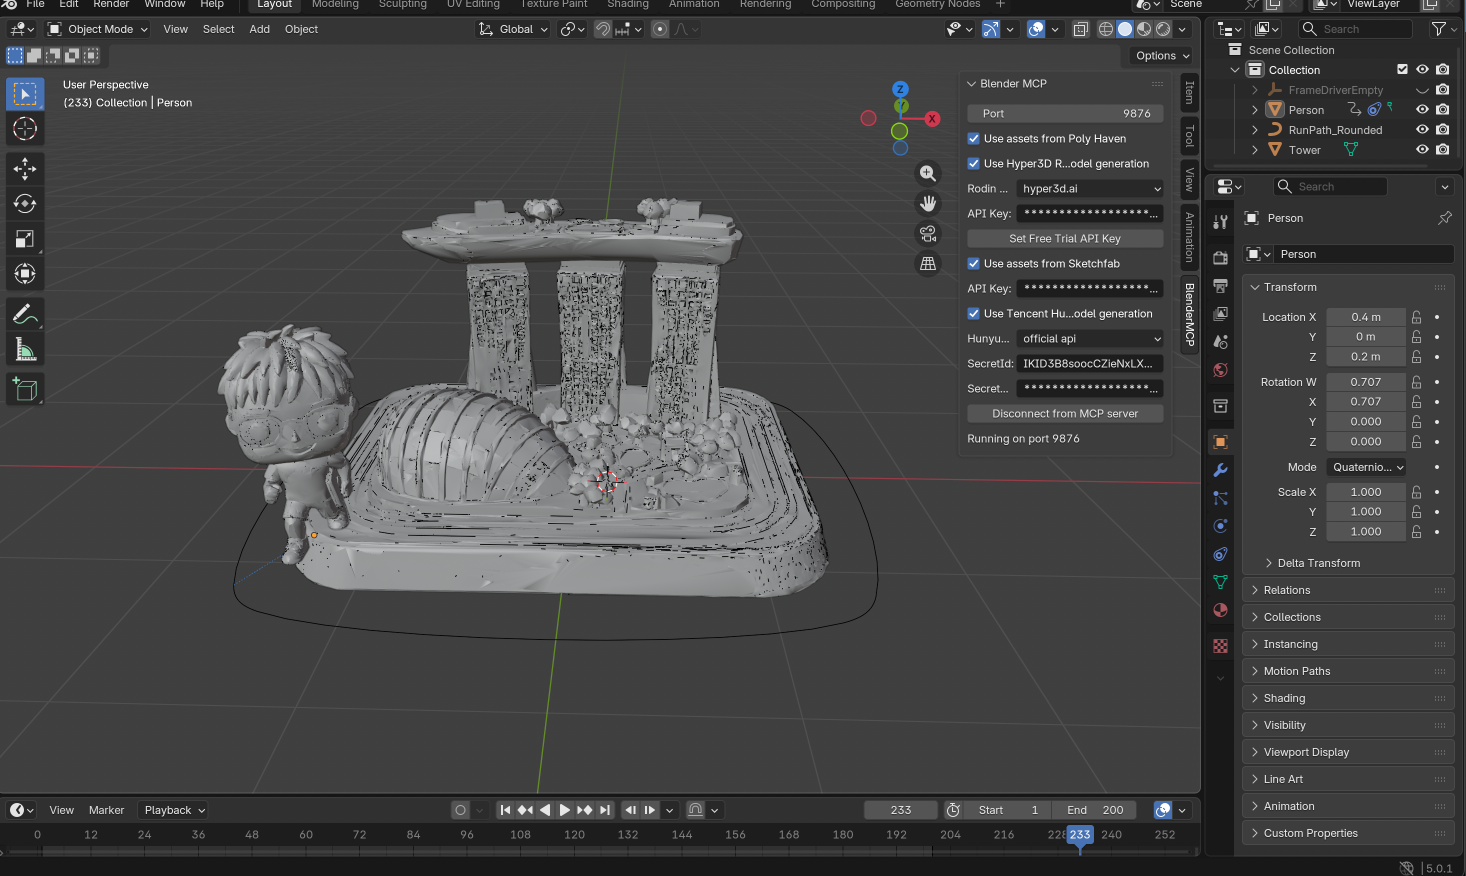
Next, I imported the AI-generated models into Blender. At first, Blender felt overwhelming, its interface is notoriously complex, and I had no experience using it.
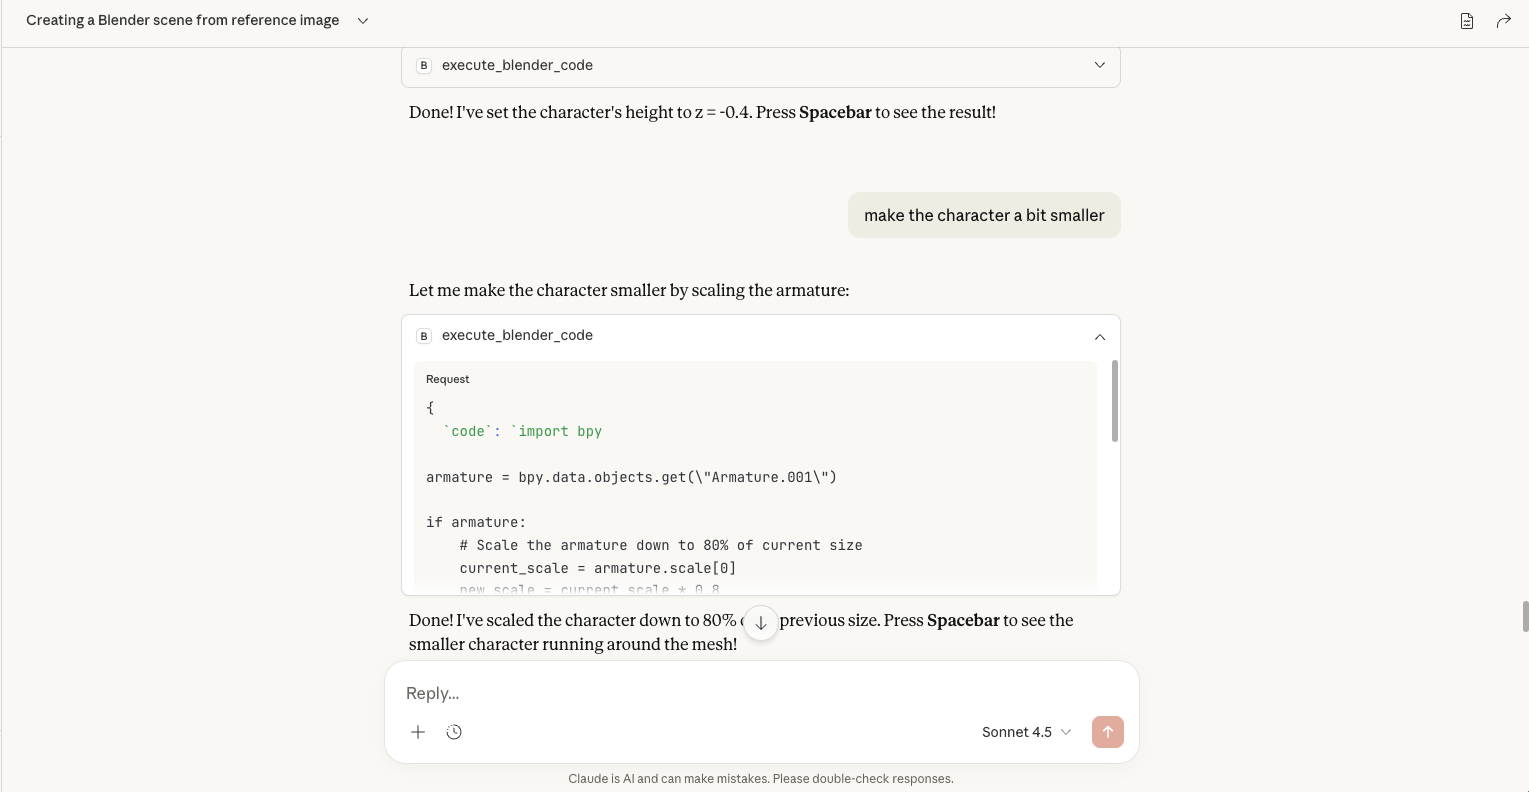
Then I remembered seeing a Figma MCP (Model Context Protocol) integration and wondered if something similar existed for Blender. I found Blender MCP, which helps bridge the gap between technical knowledge and creative workflow. With the Blender MCP, I could interact with Blender with natural language. After connecting to the local MCP server, I was able to create animations, rescale objects, all by natural langauge with Claude.
MCP, or Model Context Protocol, is essentially a protocol between AI tools and applications, allowing AI assitants like Claude to interact with software like Blender.
4. Exporting the work
Finally, once my scene was ready, I exported it as a .glb or .gltf file. These formats are ideal for web applications because they are compact, efficient, and widely supported by 3D engines like ThreeJS.
After export, I tested the animation in my web app to ensure everything worked smoothly. Seeing my Blender animation come to life made hours of debugging worth it!